Getting Started with the Nikon D5100
Whether you’ve just purchased the Nikon D5100 or have been using it for some time, this page will give you a better understanding of your camera and the included accessories.
Towards the bottom of this page, you’ll find my personal pre-flight checklist which I run through each time I power on my D5100.
So what are you waiting for? Go brew yourself a hot pot of coffee and get to know your D5100!
Unboxing the Nikon D5100
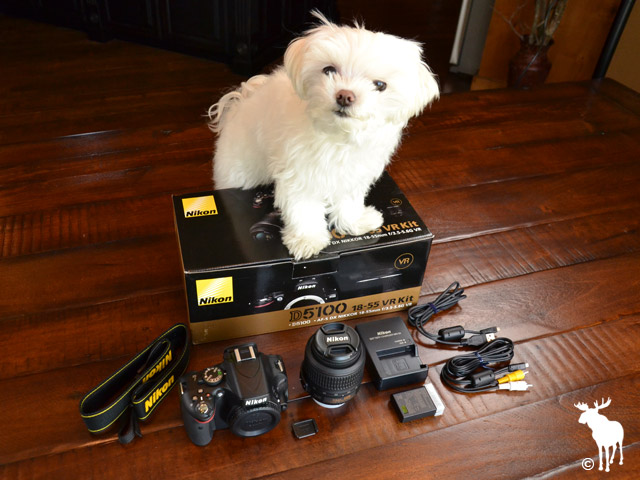
Let’s take a look at what’s included with the Nikon D5100 kit…and just in case you’re wondering, the cute dog is not included. :)
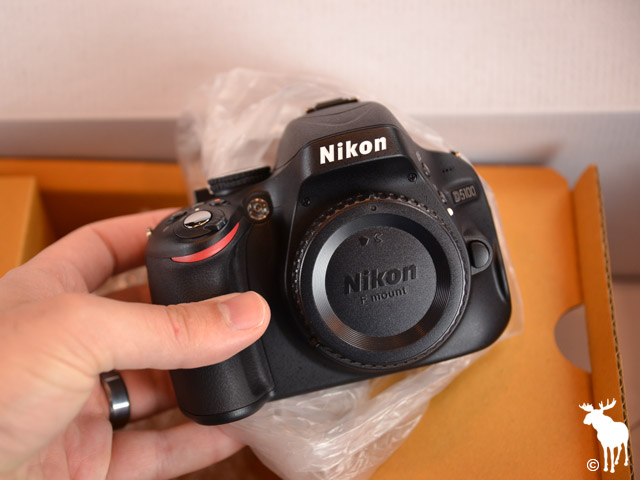
Nikon D5100 body
The array buttons and switches on the D5100 may seem a bit overwhelming at first, but over time you’ll find that it actually makes shooting easier and more enjoyable. You can reference page 1 and 2 of the manual for a complete diagram of all the controls and their functions.
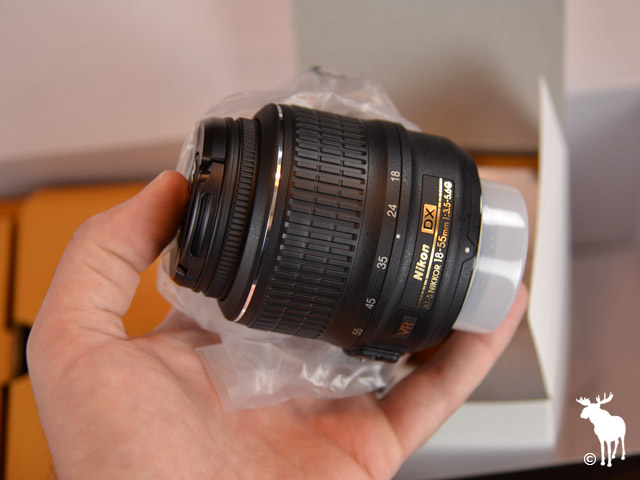
Nikon DX 18-55mm f/3.5-5.6 lens
This lens has a very popular zoom range (18-55mm), capable of capturing everything from semi wide-angle to medium telephoto shots. It comes equipped with VR (also known as vibration reduction) which can help steady your shot and minimize blur in low light situations.
The f-stop range (f/3.5-5.6) represents the maximum aperture values that are possible when shooting at 18mm or 55mm respectively. These values determine your maximum shutter speed (depends on the amount of light available) and depth-of-field (area in focus).
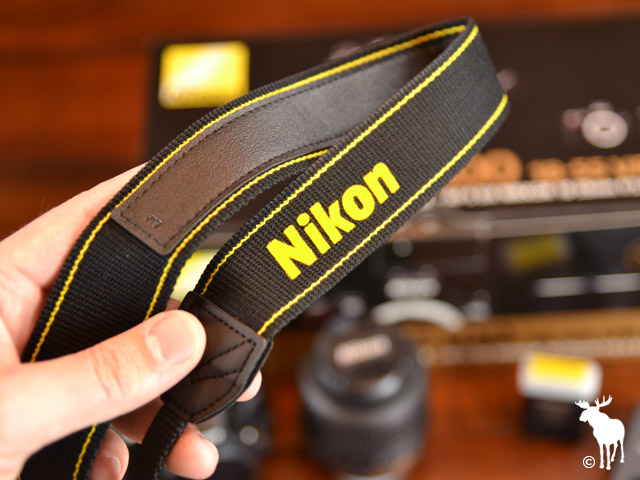
Nikon camera strap
If you’re taller than a garden gnome, you might want to attach the included camera strap to your D5100 just in case you get a case of the “butterfingers.” If you don’t like wear straps around your neck, try wrapping it around your wrist/arm as a last resort in case you lose your grip.
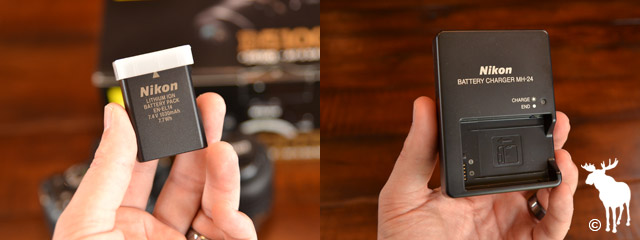
Rechargeable EN-EL14 Battery & MH-24 Battery Charger
The EN-EL14 Battery is capable of capturing 660 shots on a single charge. The MH-24 charger connects directly to your outlet without the use of wires and can complete a full charge in about an hour and a half.
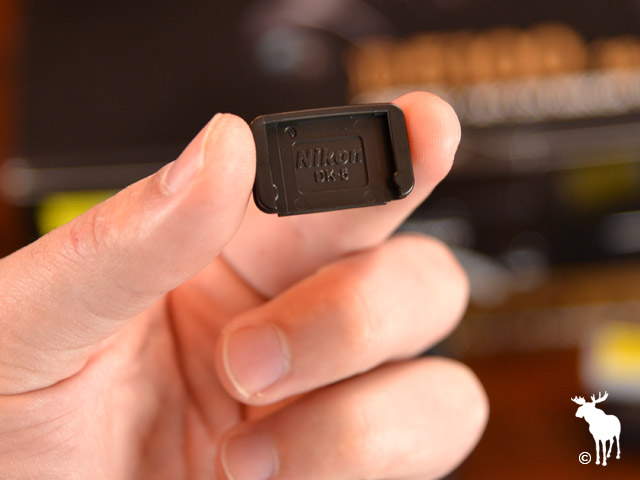
DK-5 eyepiece cap
This eyepiece cap keeps dust and moisture from finding their way into your viewfinder when not in use. It can also be used to block out stray light when capturing long exposures at night.
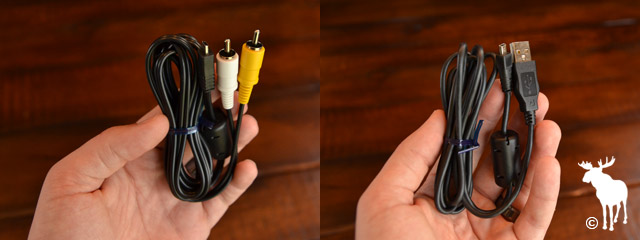
Audio/video and USB cables
The A/V cable allows you to view and playback photos and videos on your television. The included USB cable acts as a link between your camera and computer in order to transfer photos and videos to your hard drive.
Those of you with an HDTV might want to pick up a type C mini-pin HDMI cable in order to display photos and videos from the D5100 in all their HD glory.
Where’s the memory card?
In recent years, most camera manufacturer’s have opted to not include a memory card. In order to start shooting right away, you’ll need a compatible memory card.
Just to recap, here’s everything that comes with the Nikon D5100 kit…
- Nikon D5100 body
- 18-55mm VR lens
- Nikon camera strap
- EN-EL14 battery
- MH-24 battery charger
- DK-5 eyepiece cap
- USB cable
- Audio/Video cable
- Manual and warranty card
Setup Checklist
This checklist will take you through all the necessary steps for setting up your camera. I recommend running through this list each time you power on your camera.
Enable or Disable VR (Vibration Reduction)
The Nikon D5100 18-55mm kit lens comes equipped with VR (vibration reduction). Vibration reduction is the same thing as image stabilization. VR can help minimize blur cause by camera shake or small hand movements in low light situations. It can also help steady the frame when focusing on distant subjects, where even the smallest hand movements are magnified. In situations when you’re using a tripod, you’ll actually want to disable VR in order to avoid image blur.
Check Your Power
You can check the battery level by locating the battery indicator in the top right hand corner of the information LCD display. Shot-to-shot speed and flash recycling can slow down immensely with a low battery, so make sure the battery level indicator shows three full bars. For more information on the battery level indicator you can reference page 25 of the manual.
Format or Delete Your Memory Card
If you use a memory card in multiple cameras, you’ll need to format the card each time you insert it into the D5100. If you don’t switch between multiple cameras, you can just delete the data rather than formatting the card. You can check the estimated number of available images in the bottom right hand corner of the information display.
To format your card:
- Press the MENU button, then select the Setup Menu tab (wrench icon).
- Highlight Format memory card, then press the right arrow button on the multi selector.
- Highlight Yes, then press the OK button.
To delete the data on your card:
- Press the MENU button, then select the Playback Menu tab (play icon).
- Highlight Delete, then press the right arrow button on the multi selector.
- Highlight All, then press the right arrow button on the multi selector.
- Highlight Yes, then press the OK button.
Adjust the Viewfinder Focus
The optical viewfinder is equipped with a diopter adjustment control. Many times this dial will get accidentally rotated when pulling the camera in and out of a bag. If the image in the viewfinder appears to be blurry even after you’ve focused on a subject, then rotate the dial in either direction until the image appears sharp to your eyes. Think of it like focusing with a pair of binoculars.
Clean the Image Sensor
If your D5100 has been sitting for a few days without use, you might want to perform an electronic cleaning. An electronic cleaning essentially vibrates the protective filter which sits on top of the image sensor. The small vibrations kick the dirt and dust off the filter, ensuring they don’t show up in your photos.
To clean your image sensor electronically:
- Place the D5100 on a flat surface.
- Press the MENU button, then select the Setup Menu tab (wrench icon).
- Highlight Clean image sensor, then press the right arrow button on the multi selector.
- Highlight Clean now, then press the OK button.
Enable or Disable Image Review
In certain situations (like sports and wildlife photography) you may opt for faster shot-to-shot times rather than taking the time to inspect each image after it’s taken. Likewise, there are other situations where image review is quite helpful.
To Enable/Disable Image Review:
- Press the MENU button, then select the playback menu tab (play icon).
- Highlight Image Review, then press the right arrow button on the multi selector.
- Highlight ON or OFF, then press the OK button.
Adjust the Image Quality
It’s a good idea to adjust and check your image quality each time you power on your camera. I can’t tell you how many times I’ve taken a quick photo only to realize the image quality wasn’t set the way I wanted it. The D5100 offers two types of image files, RAW and JPEG. For beginners, I recommend starting out with JPEG fine.
To adjust the image quality:
- Press the “i” button.
- Highlight the QUAL tab in the top right hand corner, then press the OK button.
- Highlight FINE, then press the OK button.
Adjust the ISO
It’s a good idea to set your ISO based on the amount of light available to you. If you’re new to digital photography, I recommend sticking with AUTO ISO in most situations.
To adjust the ISO:
- Press the “i” button.
- Highlight the ISO tab, then press the OK button.
- Highlight an ISO value (100-6400) and press the OK button.
To set the ISO to Auto:
- Press the MENU button, then select the Shooting Menu tab (camera icon).
- Highlight ISO sensitivity settings, then press the right arrow button on the multi selector.
- Highlight Auto ISO sensitivity control, then press the right arrow button on the multi selector to change it from ‘OFF’ to ‘ON’.
- The Maximum sensitivity and Minimum shutter speed values allow you to control the limits for Auto ISO. For beginners, I recommend setting the Maximum sensitivity to 1600 and the Minimum shutter speed to 1/30.
Adjust the White Balance
The Nikon D5100 does a pretty good job selecting the correct white balance settings. If you notice the colors in your photos seem to be off (especially skin tones) then chances are the D5100 is having a hard time reading which type of light you’re under.
To set the white balance:
- Press the “i” button.
- Highlight the WB tab, then press the OK button.
- Highlight one of the following options: Auto, Incandescent, Flourescent, Direct Sunlight, Flash, Cloudy, Shade or Preset Manual.
- Press the OK button.
Select a Shooting Mode
In AUTO mode, the D5100’s primary objective is to get an accurate exposure. It has no idea what type of subject (or scene) you’re shooting and the type of effect you’re trying to achieve. Scene Modes allow you to tell the D5100 exactly what you’re looking at, which in turn automatically adjusts the shutter speed, f-stop and a host of other advanced settings in order to capture a better looking photo.
To select a shooting mode:
- Rotate the mode dial to on of the following options: Portrait, Landscape, Child, Sports, Close-up.
- You can access additional scene modes by rotating the mode dial to SCENE and then rotating the command dial to cycle through the following options: Night Portrait, Night Landscape, Party/Indoor, Beach/Snow, Sunset, Dusk/Dawn, Pet Portrait, Candlelight, Blossom, Autumn Colors and Food.