Landscape Photography Settings, Tips & Tricks for the Nikon D3100
My wife and I recently moved to the Ozarks. You might be wondering, what the heck is the “Ozarks”? Well, it’s formally called the Ozark Plateau. To put it simply, it’s a bunch of “low” mountains or rolling hills as I like to call them (I’m from California where we have REAL mountains with jagged peaks). The Ozarks cover much of southern Missouri and also edge into Kansas, Arkansas, Okalhoma and Illinois.
Ok, the geography lesson is over…just trying to set the stage.
So, there’s this nearby lake called Table Rock. It’s not your normal, round shaped lake. Because of the mountainous terrain, the lake has this snake like shape, with lots of little coves.
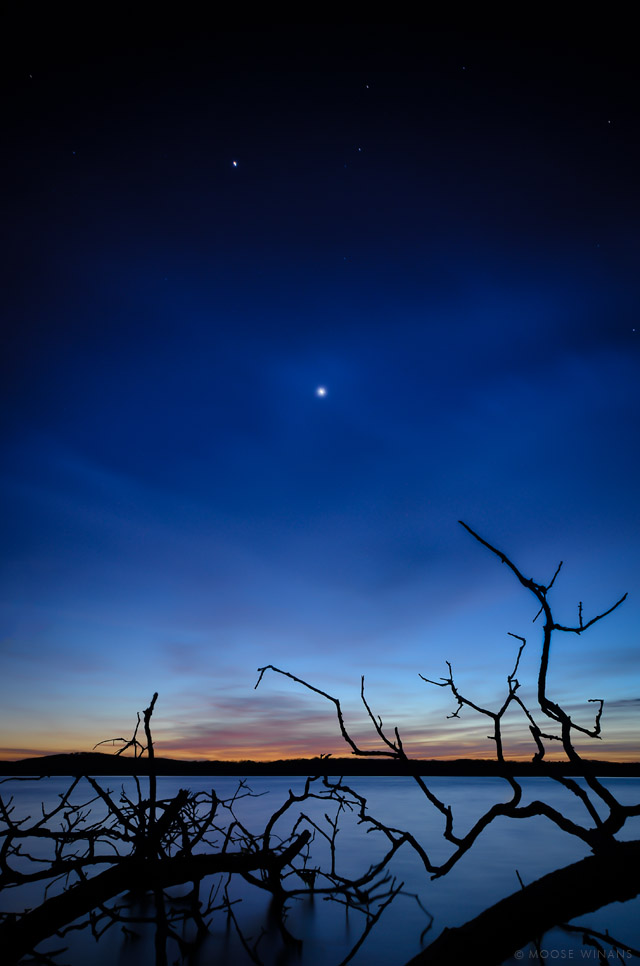
One night, I made my way down to the waters edge and took in this peaceful scene. Something really struck me as I peered over the lake. No, it wasn’t a water snake (lame attempt at a joke). What struck me was this juxtaposition of the mangled tree limbs and the soft stillness of the water and sky.
After taking in the scene for a few minutes, I settled on this composition. After attaching the Nikon D3100 to a tripod, I composed the shot to my liking.
In case you’re wondering, I was using the Sigma 10-20mm f/4-5.6 which captures a super wide field of view. By using a wide-angle lens, I was able to get much of the foreground (tree limbs & lake) and a large portion of the twilight sky into the frame of the shot. Those of you with the kit lens, just zoom all the way back to 18mm to get the widest field of view.

With the landscape scene composed, I proceeded with setting up my camera.
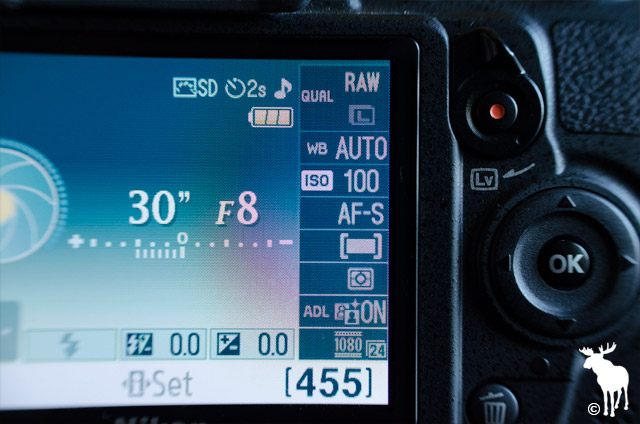
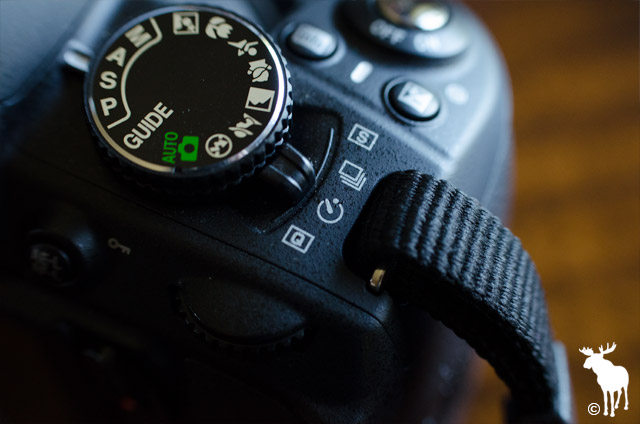
I started by setting the Shooting Mode to Aperture Priority (A on the mode dial) and set the Aperture f-number to f/8.
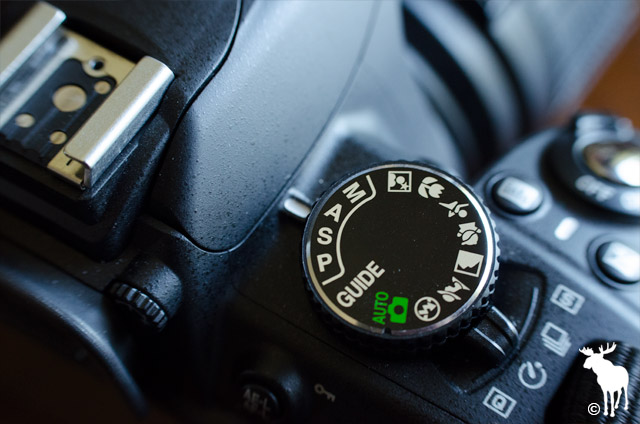
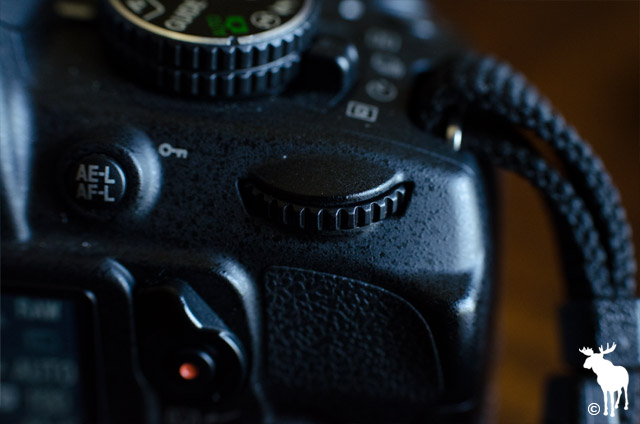
To set the aperture f-number, just rotate the command dial.
When shooting a landscape, I always start with f/8. Depending on how much light is available, I may increase it to f/11 or f/16 to make sure the features in the distance are in focus. Since I was shooting at twilight and the distant hills were a silhoutte, I wasn’t worried about capturing detail on that distant shore.
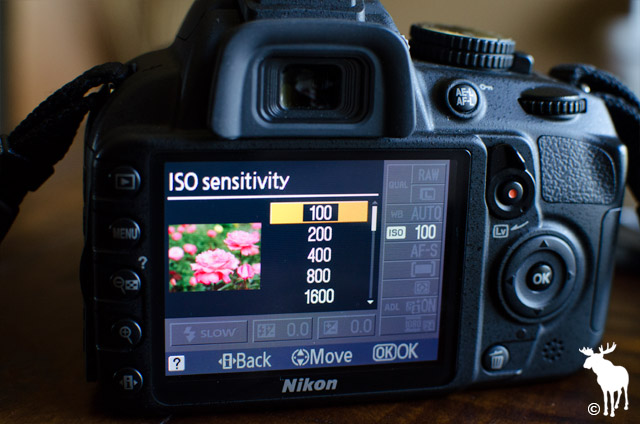
Next, I set the ISO to 100 which ensures I end up with less image noise (compared to higher ISO’s).
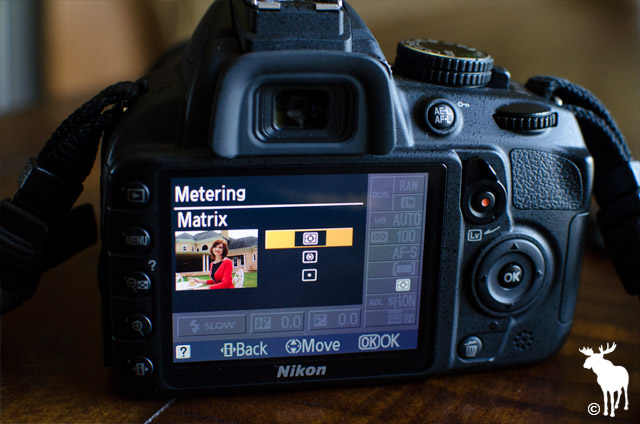
I then adjusted the Metering to Matrix, which meters the entire scene (sky, lake and tree limbs).
Because the light was fading, I didn’t have to contend with too much contrast between the lake and the sky. Had I composed this exact same shot an hour earlier as the sun was setting, the sky would’ve been blown out (too bright). The only way around it would’ve been to do an HDR exposure. An HDR exposure consists of taking three images at varying levels of exposure (normal, underexposed and overexposed). These three images are then combined together using HDR software. When combined, it retains detail in the sky while also properly exposing the foreground (lake).
With the aperture, ISO and metering in place, the D3100 chose a Shutter Speed of 30 seconds. When shooting in Aperture Priority (A), you select the aperture and the camera selects the shutter speed.
When shooting at night, it’s best to stay under a 30 second exposure in order to eliminate excessive noise and hot pixels (brightly colored dots).
Knowing the light was fading, I had to hurry in order to keep my ISO at 100 and my shutter speed at or below 30 seconds.
So I quickly adjusted the AF-Area Mode to Auto-Area AF and the Focus Mode to AF-S. Auto-Area AF chooses the best focus point based on the amount of contrast.
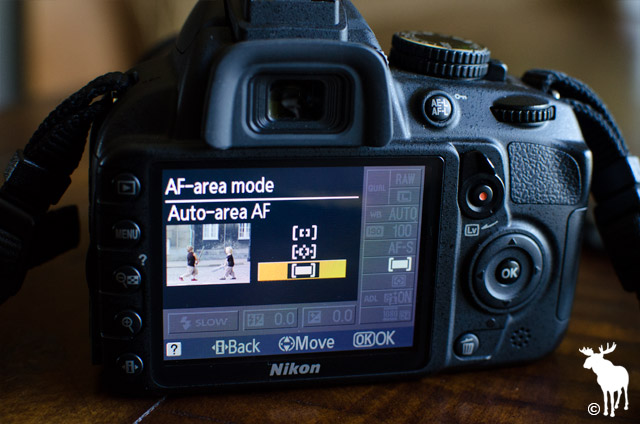
In this case it focused on the tree limbs in front of me. Had it been a bit darker, I would’ve switched over to Single-point AF and chosen the focus point manually on an area with lots of contrast.
With the focus mode set to AF-S, I was able to lock the focus with a half-press of the shutter button.
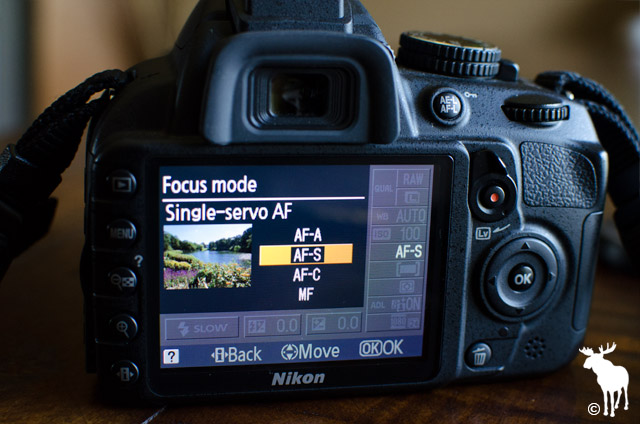
This is important, because as the light fades it gets harder and harder to autofocus. With the focus locked, I set my lens to manual focus. By doing this, I could take shot after shot without having to autofocus each time.
TIP: To do this with your kit lens, just slide the A/M switch to M.
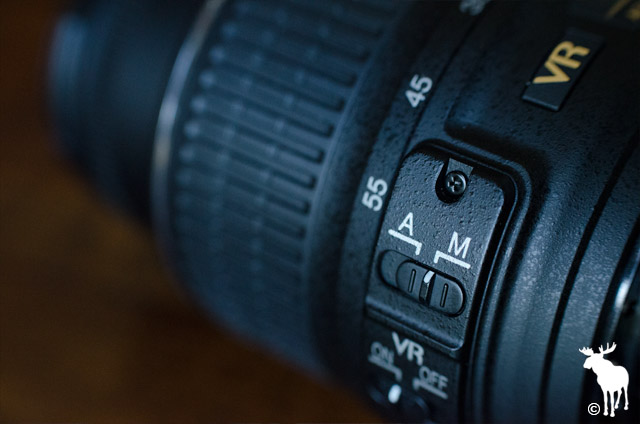
The Sigma lens I was using doesn’t have VR (vibration reduction). If I was using the kit lens or another lens with VR, I would’ve disabled it. Whenever you have your D3100 mounted to a tripod, be sure to turn VR OFF. Otherwise the lens will try to compensate for movements that aren’t there and you’ll end up with a blurry shot.
Once I had all my primary settings in place, I set the Release Mode to Self-timer, and fully pressed the shutter button. The self-timer allows me to get my hands off the camera, ensuring my movements don’t affect the sharpness of the image.
Finally, when shooting landscapes be sure to set your Image Quality to NEF (RAW).
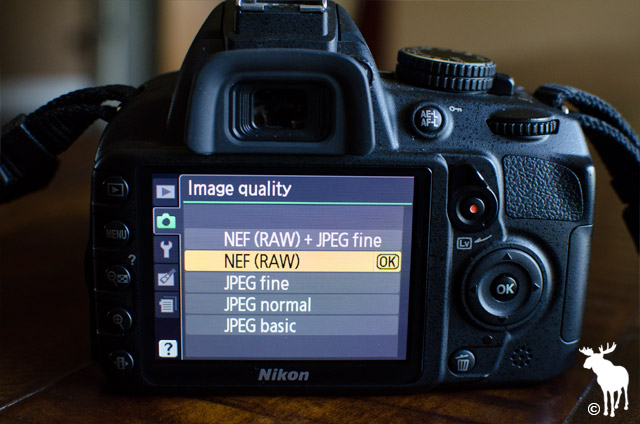
RAW essentially preserves more ‘light’ data, allowing you to correct the white balance, the exposure and image noise when post-processing your images. In this particular case, I was able to increase the exposure to brighten up the lake and shift the white balance to make the image a bit more blue.
Landscape Settings for the Nikon D3100
Here’s a recap of the settings I used…
- Aperture Priority mode (A on the mode dial)
- Aperture set to f/8
- ISO set to 100
- Shutter Speed set to 30 seconds (chosen by the camera)
- Image Quality set to NEF (RAW)
- Focus Mode set to AF-S
- AF-Area mode set to Auto-Area AF
- Metering set to Matrix
- Release Mode set to Self-timer
- Focal Length (zoom) set to 14mm
Landscape Cheat Sheets for the Nikon D3100
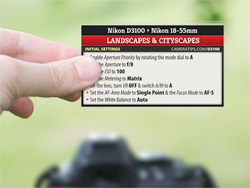 If you’re interested in landscape photography and looking to get out of Auto mode, I encourage you to check out my Cheat Cards for the Nikon D3100 which tell you exactly which settings I would use for taking landscapes (day or night), cityscapes, sunsets, sunrises, waterfalls, and much more.
In case you’re wondering, they can be printed at home or viewed on an iPhone, Android, iPad, Kindle or computer.
Secret Settings & Modes For Shooting Landscapes
Here are a few features and functions buried deep within the Nikon D3100 menu system that you may find helpful in certain landscape type situations.
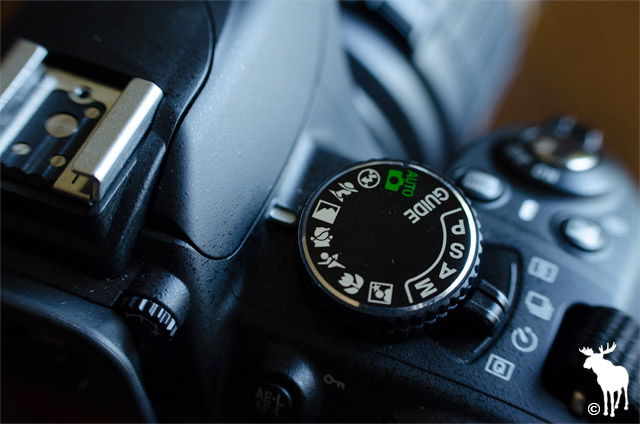
Landscape Scene Mode
If you’re in a hurry and you need to quickly setup your camera to take a landscape shot, then just rotate the Mode dial to the Landscape Scene Mode.
I’ve been in many situations where my camera is setup for something like portraits and all of a sudden I’m presented with unbelievable light or a colorful sunset that might disappear at any moment.
Remember, it’s always better to get the shot rather than missing the shot completely.
The landscape scene mode will automatically choose many of the same settings mentioned above (high aperture f-number, low ISO, etc…) in order to put the entire scene into focus. Thankfully in this particular situation, I was able to enjoy the serenity of the lake while taking my time adjusting the in-camera settings.
If you’re interested in using manual settings for shooting landscapes, night landscapes, sunsets, sunrises, etc… I have a pack of Cheat Cards for the Nikon D3100 which walk you through the process step-by-step, click here for more info.
Self-timer Delay
By default, the self-timer is set to 10 seconds. With the light quickly fading, I didn’t want to wait 10 seconds in-between each shot. So I adjusted the Self-timer Delay to 2 seconds.
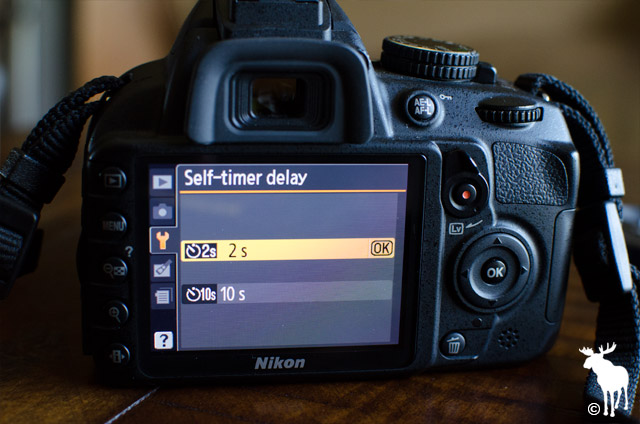
See page 143 in the manual for setup instructions.
Live View
If there’s one thing Live View is pretty good at, it’s landscape photography. Since there aren’t any fast moving objects to focus quickly on, you can use Live View to compose the scene when shooting in awkward positions.
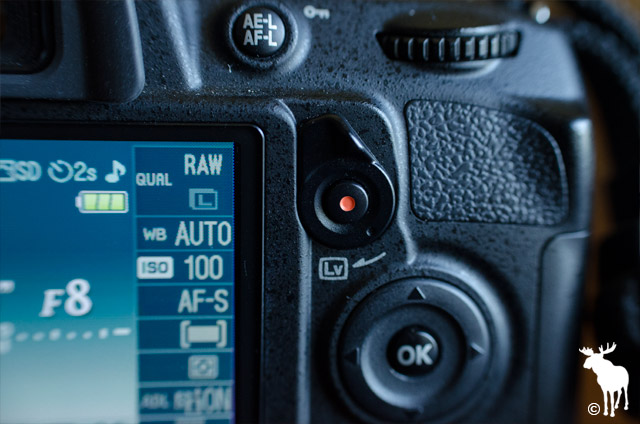
In this case, I was quite low to the ground and very close to the water. Trying to get myself into a ninja position in order to look through the viewfinder would’ve been too much work. So I used Live View to get the framing that I liked, then I flipped back to the regular shooting mode to adjust the in-camera settings and capture the final image.
See page 37 in the manual for setup instructions.
High Dynamic Range (HDR)
As I mentioned in my walkthrough (above), you may run into certain situations where the sky may be too bright or the landscape is too dark. For this particular photo the sun had set about an hour before, which allowed me to get an accurate exposure of the sky and lake in a single shot. If you’re shooting during the day and the sky is overexposed (too bright) or the landscape is underexposed (too dark), then do an HDR exposure.
If you’re intimidated by the whole process, the Nikon D3100 has a specialized HDR mode called Active D-Lighting which brightens shadows and darkens highlights in order to give you a more natural looking shot in high contrast sitautions.
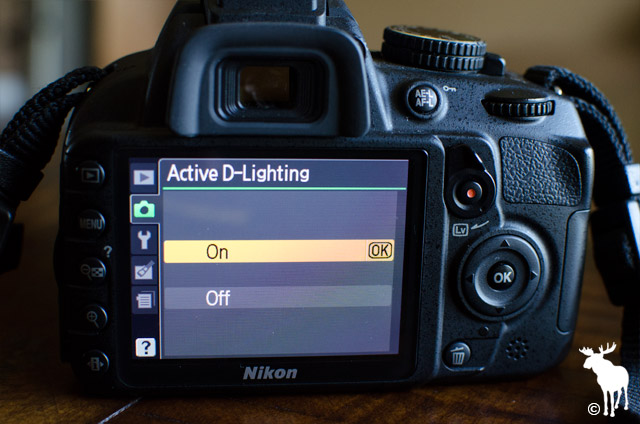
For more on this feature, check out page 85 of the manual for setup instructions.
For more tips and tricks, check out the forum or jump back to the Nikon D3100 homepage. Happy shooting!