Landscape Photography Tips & Settings for the Nikon D5100
Setting Up & Taking The Shot
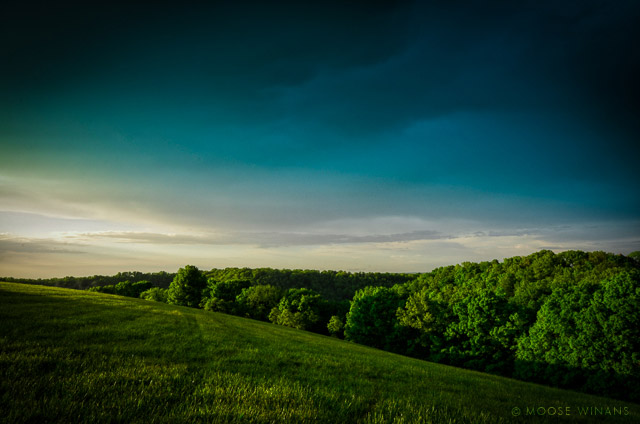
So I was on my way home, driving through a torrential downpour when all of a sudden the clouds broke and the sun decided to peak through and cast some dramatic light along this lush hillside. Naturally, I pulled over to take a shot.
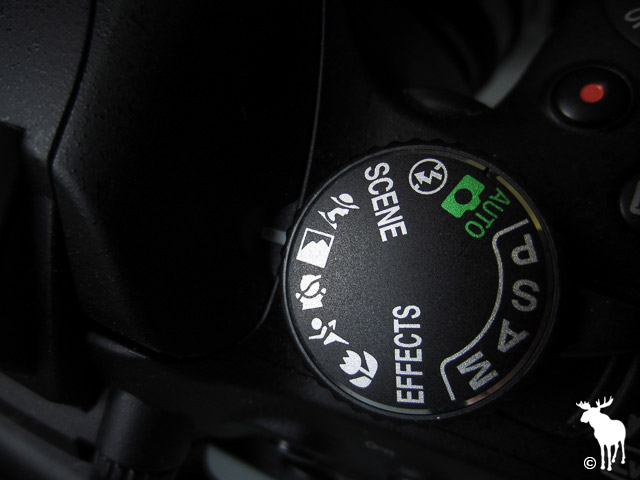
In these fleeting moments, it’s quite difficult to make sure everything is setup correctly. You’re fumbling around trying to get the camera out of the bag and pointed in the right direction before the light disappears. To make sure I got the shot, I quickly mounted my D5100 to a tripod, adjusted the framing to get a composition that I liked, rotated the mode dial to the Landscape Scene Mode and took the photo.
Remember, it’s always better to get the shot rather than missing the shot completely.
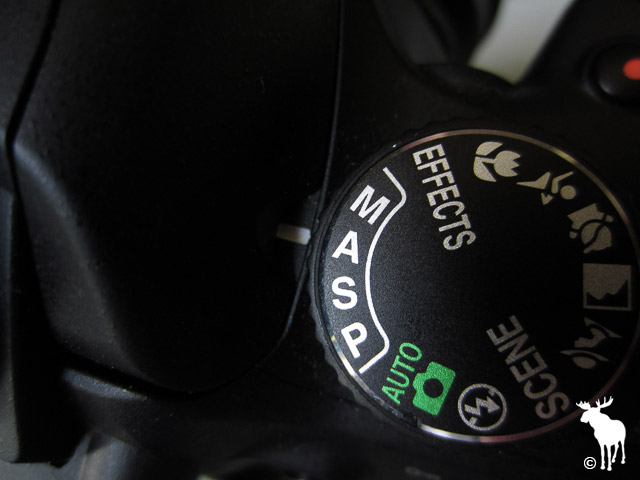
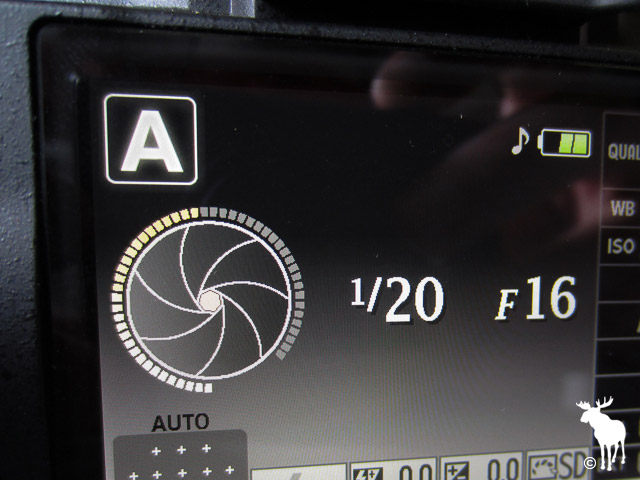
Looking to my left, it appeared I had another minute or so to take another photo. This time I went through my checklist and setup everything manually. I switched the Shooting Mode to Aperture Priority (A on the mode dial) and set the Aperture f-number to f/16.
For most landscape scenarios, setting the aperture to f/8 would’ve be just fine. However, in situations where the foreground (area right in front of you) takes up a good portion of the frame, then it’s a good idea to adjust the aperture beyond f/8. In this case, f/16 allowed me to get everything in focus, from the grass right in front of me to the distant rolling hills.
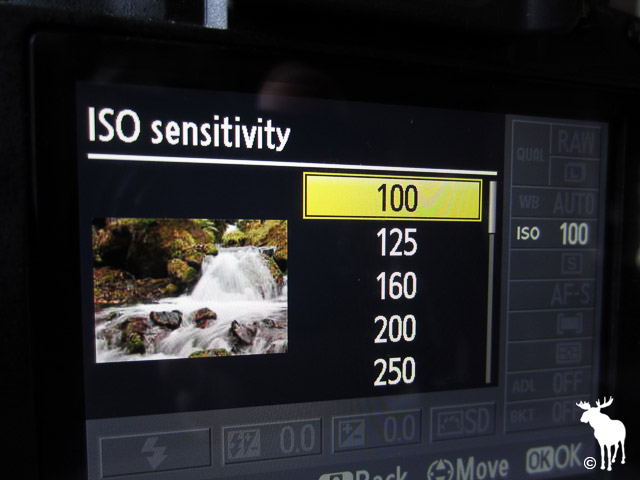
With my camera mounted to a tripod, I was able to set my ISO to 100. Lower ISO’s produce sharper, more colorful photos with less image noise.
This aperture and ISO combination resulted in the D5100 choosing a Shutter Speed of 1/20.
Had I forgotten my tripod, a shutter speed of 1/20 would have been too slow to shoot hand-held. My only choice would have been to increase the ISO in order to get a fast enough shutter speed to eliminate the chance of my hand movements causing blur to the image.
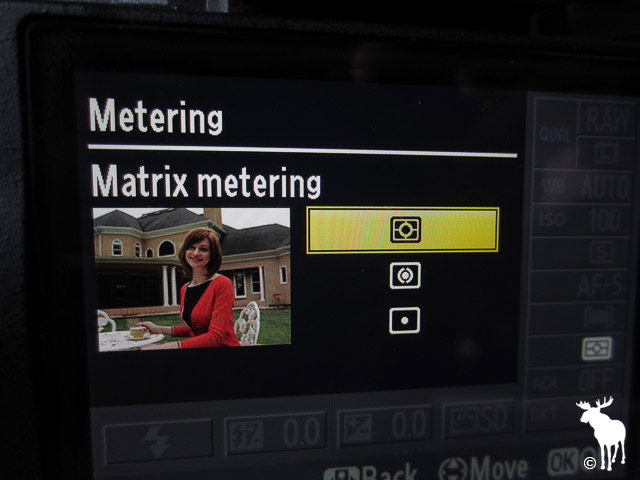
Next, I set my Metering to Matrix, which tells the D5100 to meter both the sky and the hillside. Since the sun was to my left and outside the frame of the shot, I was able to preserve both the sky and the rolling hills. In some situations, the sky may be too bright which will either result in a blown out (bright) sky or an underexposed (dark) landscape. In those situations, it’s best to do an HDR exposure.
With all of my “exposure” adjustments in place, I now turned my focus to autofocus. :)
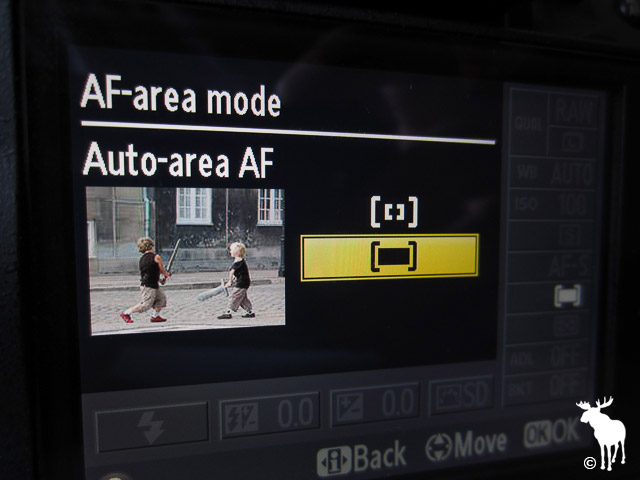
I set the AF-Area Mode to Auto-Area AF and the Focus Mode to AF-S. Since there was no singular subject to focus on, I let Auto-Area AF choose the focus point for me. Had there been a patch of flowers or a person in the frame, I would’ve chosen Single-point AF and focus on that first before re-composing the shot.
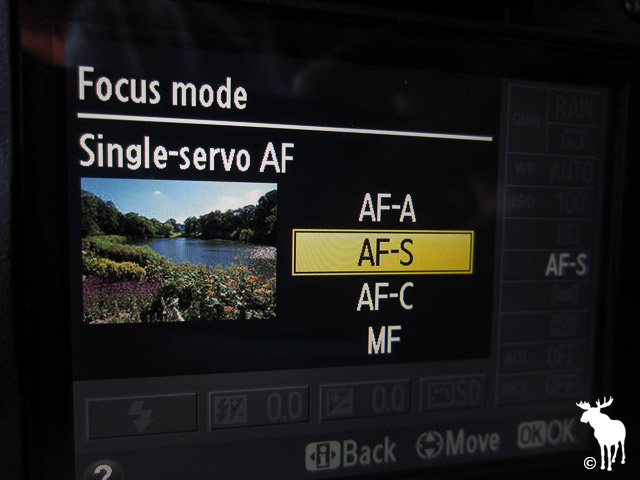
As for AF-S, I chose it because it allows me to pre-focus on a scene and then re-frame for a better overall composition without changing the focus. In this case, I pre-focused on the horizon and then re-composed the photo to include more sky.
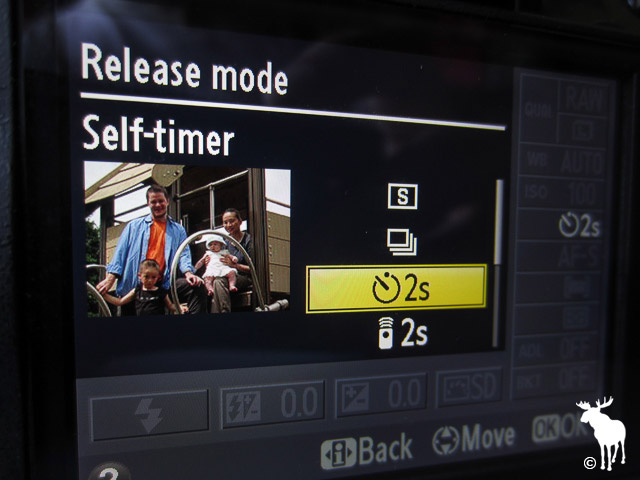
Once I had everything locked in, I switched the Release Mode to Self-timer, and full pressed the shutter button. By using the self-timer, I eliminate the chance of camera shake and ensure I end up with a sharp photo.
One final note. When shooting landscapes, set your image quality to NEF (RAW). RAW essentially preserves more ‘light’ data, which gives you the ability to recover and fix overexposed and underexposed areas in post-processing. In this particular case, it allowed me to bring down highlights in the sky (towards the left of the frame) and brighten shadows in the trees.
Landscape Settings for the Nikon D5100
Here’s a recap of the settings I used…
- Aperture Priority mode (A on the mode dial)
- Aperture set to f/16
- ISO set to 100
- Image Quality set to NEF (RAW)
- Focus Mode set to AF-S
- AF-Area mode set to Auto-Area AF
- Metering set to Matrix
- Release Mode set to Self-timer
- Focal Length (zoom) set to 18mm
- Vibration Reduction turned OFF
- A/M switch set to A
Landscape Cheat Sheets for the Nikon D5100
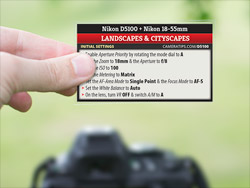 If you’re interested in landscape photography and looking to get out of Auto mode, I encourage you to check out my Cheat Cards for the Nikon D5100 which tell you exactly which settings I would use for taking landscapes (day or night), cityscapes, sunsets, sunrises, waterfalls, and much more.
In case you’re wondering, they can be printed at home or viewed on an iPhone, Android, iPad, Kindle or computer.
Secret Settings & Modes For Shooting Landscapes
Here are a few features and functions buried deep within the Nikon D5100 menu system that you may find helpful in certain landscape type situations.
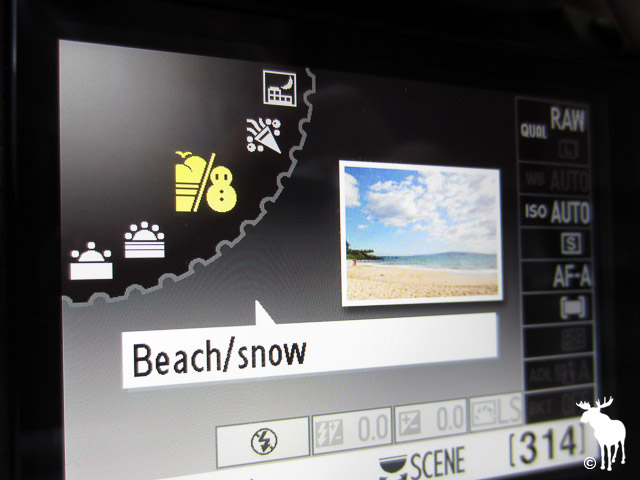
Specialized Scene Modes
As I mentioned above, had the sun only poked out for a few seconds, I would have missed the shot trying to set everything up manually. Luckily it illuminated the hillside for a few minutes before disappear behind some clouds, but it’s always a good idea to get the shot rather than missing it completely. The built-in scene modes are the fastest way to setup your D5100 in these moments where you don’t have a lot of time…
- Night Landscape – Reduces noise and minimizes color casts when shooting nighttime cityscapes.
- Beach/Snow – Tries to correctly balance brightly lit snowy or sandy landscapes.
- Sunset – Enhances colorful sunsets and sunrises.
- Dusk/Dawn – Preserves colors in the sky during the hour before sunrise and the hour after sunrise.
See page 32 and 33 of the manual for setup instructions on all four of these modes. If you’re interested in using manual settings for shooting landscapes, night landscapes, sunsets, sunrises, etc… I have a pack of Cheat Cards for the Nikon D5100 which walk you through the process step-by-step, click here for more info.
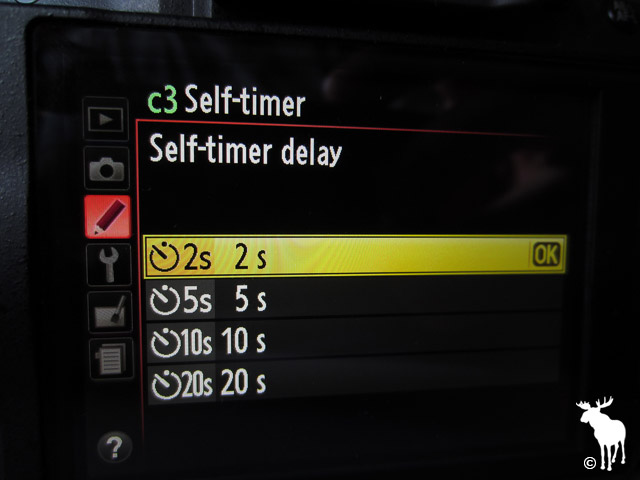
Self-timer Delay
By default the self-timer waits 10 seconds before taking the shot, which isn’t great for landscape photography. In this particular case, I set the self-timer delay to 2 seconds which allowed me to rattle off shot after shot without much hesitation. The lighting conditions were changing by the second, so I wanted a number of options to choose from. See page 160 in the manual for setup instructions.
Live View
In situations where I have more time, I’ll use Live View to compose my shot using the LCD screen. In this instance, I jumped out of my car, got the camera setup on a tripod and composed the framing through the optical viewfinder. To be honest, I think this shot would have been a bit stronger had I got closer to the ground to capture more grass detail.
When shooting at awkward heights, Live View can be immensely helpful. However, keep in mind that the focus speed is ridiculously slow, so it’s best suited for motionless subjects/scenes. See page 99 in the manual for setup instructions.
High Dynamic Range (HDR)
As I mentioned in my walkthrough (above), you may run into certain situations where the sky may be too bright or the landscape is too dark. Thankfully the sun was to my far left (outside of the visible frame of the photo), which allowed me to get an accurate exposure of the sky and landscape in a single shot. If you can’t avoid the sun or you want to include the sun then you’ll need to do an HDR exposure.
I prefer to do my HDR shots manually. If you’re interested I have an HDR Cheat Card, which walks you through the process step-by-step.
If you’re intimidated by the whole process, the Nikon D5100 has a specialized HDR mode that takes two photos and automatically combines them in-camera to give you a well exposed HDR shot. For more on this HDR feature, check out page 76 of the manual for setup instructions.
For more tips and tricks, check out the forum or jump back to the Nikon D5100 homepage. Happy shooting!