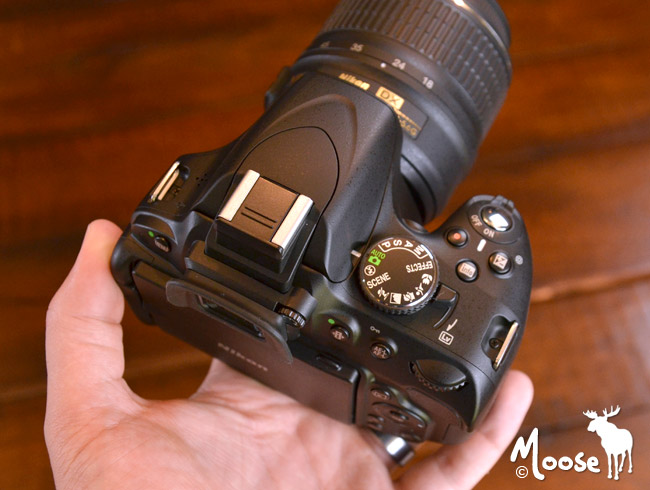
Settings & Shooting Modes for the Nikon D5100
If you’re new to digital photography, chances are you’ve resorted to using Auto mode for all subjects and situations. This is fine if you’re trying to get an accurate exposure, however, in order to capture cool effects and freeze fast action you’ll need to venture into more advanced modes.
Before jumping head first into Aperture priority, Shutter priority or Manual mode, I recommend starting with scene modes.
Scene Modes
Here’s a list of the available scene modes on the Nikon D5100…
Scene Modes on the Mode Dial
- Portrait
- Landscape
- Child
- Sports
- Close-up
Scene Modes available with SCENE selected on the Mode Dial
- Night Portrait
- Night Landscape
- Party/Indoor
- Beach/Snow
- Sunset
- Dusk/Dawn
- Pet Portrait
- Candlelight
- Blossom
- Autumn Colors
- Food
By selecting a scene mode, you’re telling the D5100 exactly what you’re looking at which helps it determine the best settings to use in that specific situation.
Over time, you’ll begin to understand how aperture, shutter speed and ISO work together to capture a sharp and accurately exposed image.
Aperture & Shutter Priority
At that point, it would be a good idea to start experimenting with Aperture priority (A on the mode dial) and Shutter priority (S on the mode dial).
As a general guideline, Aperture priority is great for controlling depth of field, like isolating subjects against a blurry background or putting the entire scene into focus. Shutter priority is fantastic for controlling movement, like freezing fast action or capturing the movement of water.
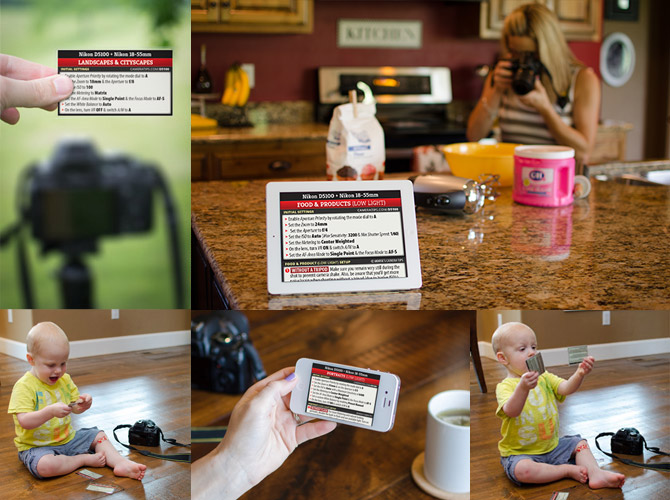
Need Help with Settings?
If you’re feeling adventurous and want to begin learning how to shoot with Aperture or Shutter priority, then I encourage you to check out my Cheat Cards for the Nikon D5100. These nifty little cheat sheets will tell you exactly which settings I would start with. My settings are specific to the Nikon D5100 and select Nikon lenses which allows me to provide very detailed settings, improving your odds of capturing a keeper. Sound good? Click here for more info.
Quick Reference for Adjusting Popular Settings & Modes
If you don’t have a manual handy, I’ve corralled some of the more commonly used functions and settings below.
Center-weighted metering
To enable Center-weighted metering…
- Press the (i) button
- Highlight the Metering tab (third tab up, from the bottom right of the LCD info panel)
- Press the (OK) button
- Select Center-weighted Metering
Continuous Shooting (Burst)
To enable Continuous shooting (burst)…
- Press the (i) button
- Highlight the Release mode tab (fifth tab down, from the top right of the LCD info panel)
- Press the (OK) button
- Select Continuous
Custom White Balance
To set a custom white balance…
- Press the (i) button
- Highlight the White Balance tab (it’s the second tab down, from the top right of the LCD info panel)
- Press the (OK) button
- Select one of the available presets (incandescent, fluorescent, etc…) or set a custom white balance by selecting Preset Manual (PRE)
- Follow the on-screen instructions for setting the white balance
Night Portrait Mode
To enable Night Portrait mode…
- Rotate the mode dial to the SCENE icon
- Rotate the small command dial (near the thumb rest) to select Night Portrait
Portrait Mode
To enable Portrait mode, just rotate the mode dial to the icon with a lady wearing a hat.
Portrait Picture Control
To enable Portrait Picture Control…
- Press the (i) button
- Highlight the Picture Control tab (fourth tab from the left on the bottom row the LCD info panel)
- Press the (OK) button
- Select PT for Portrait
Red-eye Reduction
To enable Red-eye Reduction…
- Press the (i) button
- Highlight the current Flash Mode tab (far left tab on the bottom row the LCD info panel)
- Press the (OK) button
- Choose a flash mode with Red-eye Reduction (eye icon)
Red-eye Correction
To enable Red-eye Correction…
- Press the MENU button
- Navigate to the Retouch Menu
- Highlight Red-eye Correction
- Press the (right) arrow to display the picture selection dialog
- Select a photo and press (OK)
- Press (OK) to confirm red-eye removal and to create a copy
Selective Color
To enable Selective Color…
- Press the MENU button
- Navigate to the Retouch Menu
- Highlight Selective Color
- Press the (right) arrow to display the picture selection dialog
- Select a photo and press (OK)
- Use the left, right, up and down arrows to position the cursor over the area you want to keep in color
- Press the (AE-L/AF-L) button to select the color of the object
- Rotate the command dial (next to the thumb rest) to highlight the color range
- Press the up or down arrows to increase or decrease the color range
- When you’re happy with the end result, press the (OK) button to save a copy of the image
Self Timer
To enable the Self Timer…
- Press the (i) button
- Highlight the Release Mode tab, then press the OK button
- Highlight the Self-timer option (clock icon), then press the OK button
Self Timer Delay
To adjust the Self Timer Delay…
- Press the MENU button, then select the Retouch Menu tab (paint brush icon)
- Highlight Timers/AE lock, then press the right arrow button on the multi selector
- Highlight Self-timer (c3), then press the right arrow button on the multi selector
- Highlight Self-timer delay, then press the right arrow button on the multi selector
- Choose from one of the following options: 2s, 5s, 10s or 20s (s = seconds)
Single-servo AF
To enable Single-servo AF…
- Press the (i) button
- Highlight the Focus-mode tab (fifth tab up, from the bottom right of the LCD info panel)
- Press the (OK) button
- Select AF-S (Single-servo AF)
Single-point AF
To enable Single-point AF…
- Press the (i) button
- Highlight the AF-Area Mode tab (fourth tab up, from the bottom right of the LCD info panel)
- Press the (OK) button
- Select Single-point AF
- Use the left, right, up and down arrows to control the focus point
Spot metering
To enable Spot metering…
- Press the (i) button
- Highlight the Metering tab (third tab up, from the bottom right of the LCD info panel)
- Press the (OK) button
- Select Spot Metering
Time Stamp
To enable the Time Stamp…
- Press the MENU button, then select the Retouch Menu tab (paint brush icon)
- Highlight Shooting/display, then press the right arrow button on the multi selector
- Highlight Print Date (d5), then press the right arrow button on the multi selector
- Highlight Date or Date and time, then press the OK button
- After enabling the time stamp feature, you should see a DATE icon in the upper portion of the LCD information display
Vivid Picture Control
To enable Vivid Picture Control…
- Press the (i) button
- Highlight the Picture Control tab, then press the OK button
- Highlight VI (Vivid) and press the OK button
Happy shooting! :)